

While travelling on a bike around the world, you are vulnerable to an array of health and safety elements: water hygiene, traffic, climate, dogs and other more personal issues. After a few years of continuous cycling, we have accumulated some tips and tricks regarding health and safety on the road. Some of them are obvious, some a little bit obscure and others with a more individual approach. Whatever, we hope at least a few will be helpful for you when planning your next loaded bike tour.
So, you need a water treatment system for your bike journey?
We have only ever used the Katadyn Pocket Filter and it is so fabulous, that we have no experience tales to tell you about any other products. It weighs 550 grams, filters 1 liter per minute and the element will last up to 50,000 liters. With a ceramic 0.2 micron cartridge, it protects against bacteria and protozoa in the water and after an estimated 50,000 litres, you can buy a new cartridge and start again. We have seen plenty of other water treatment products in action too and all have their pros and cons. But there is enough information on the web about that, so we will leave the searching up to you. Look below to see what the experts say.
However, what we would like to share with you are a couple of tips for keeping your ceramic cartridge filter in optimum condition. After all this product is not cheap, so you want it to last as long as it says it will.
Obviously, keep the filter clean and handle it with care. Dropping it can cause the micro porous structure to crack which will lead to ineffective treatment of your water. When storing ensure that the filter is completely dry. Especially so in sub zero climates since freezing can also damage the cartridge. If it really gets cold, wrap the core in a cloth and store in a warm place like a clothing pannier or your sleeping bag.
If you invest in a filter, then you are going to need something for water collection like the Sea to Summit Kitchen Sink. Not only will you use it for other purposes, but when the source water is cloudy, you have the means to let it rest before filtering. It is also a good idea to try and collect from a fresh pool and not a flow of fresh water.
Another trick is to wrap and secure a coffee filter or breathable piece of fabric on the inlet valve. But the bottom line is, if it is too difficult to filter: don't force it, clean it. If the filter is clogging up, then it is doing its job properly. In the Turkmentistan desert, the canal water was so silty, we had to do this for every litre we pumped. That's a lot of patience, but definitely peace of mind.
And here's what the experts have to say:
For an excellent chart comparing different water filters and their specifications take a look at Katadyn's Filter Technology Card. For info about food + water safety in the world scroll down to the travel destination map on the IAMAT website or alternatively choose a country on their country directory page.
www.abc-of-mountaineering.com has a concise guide outlining the basic types of water purifiers. Hiking-site.nl has in depth information about choosing the right filter for you (Dutch only).
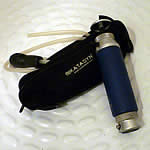
the Katadyn Pocket
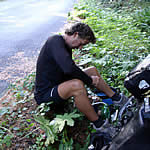
filtering water roadside
with our kitchen sink
in the USA

Keeping the water bottle fresh!
There's nothing worse than musty flavoured water and here's two ways to keep your water bottle a little fresher. While big name brands do sell "special" tablets to clean their bottles, they are at a ridiculous price. Denture cleaning tablets, on the other hand, are not and you can usually obtain them from either a well stocked supermarket or pharmacy.
Fill the bottle almost to the top and pop a tablet in and allow to soak overnight. Empty and rinse a few times with fresh water the next day. You can also use the denture cleaning powder: it does exactly the same job.
Another way to keep your water tasting good is to squeeze just a little bit of fresh lemon juice into your bottle. You don't need much to get the desired taste and it is especially good for those of you who don't like drinking water. Adds a bit of an edge, while keeping the water bottle fresh.

denture tablets can also
keep your bottles clean
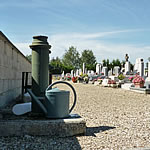
finding a water tap
at a French cemetry
Sourcing
water on the road
Looking for somewhere to fill your water bottles
up?
Well, why not try the local cemetery?
There is usually a mains tap available, so that
ground keepers and visitors can tend to the flowers
and plants. While this may not be the case in
all countries of the world, it is certainly true
in most parts of Europe.
The perfect
bike bidon
We've used plenty of different types of bike
bottles in our travels and they all have their
merits, but one small detail that came to our
attention early on was you need at least one
bottle with a wide-mouth opening. This way you
can access water from bathroom sinks where big
bottles won't fit under the tap. With one small one, you
can at least fill all your other bottles up successfully.
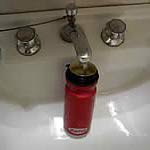
easier access to water
taps with wide-mouth
bottle opening
Riding the white line
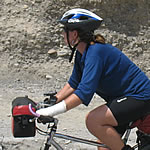
Even with the controversy about whether painted bikepaths are effective for cyclists' safety, I have to say from my on the road experience, motorists seem to see me better when I'm riding on something bright and colourful. I also get the feeling that for some strange reason, the more space I give them, the closer they seem to ride past me.
So, when things get a little uncomfortable on the highway or if I'm cycling in a small or no shoulder situation, I apply some of these ideas to my riding strategy.
Please note that the following suggestions are all personal opinions and not to be taken as the only way to deal with traffic. You have to judge the situation for yourself and the key to peace of mind touring is: if you feel safe, then cycling is generally great.
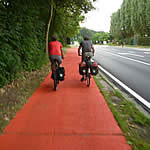
coloured bike paths make cyclists more visible
Cycle directly on the white line and not next
to it. (unless of course
traffic is coming from both directions and likely
to cross at your riding position). This might sound
strange, but I get the impression they see
me better, after all it is something drivers
take note of.
If I feel unsafe or want my presence to be felt,
I either wobble from side
to side on my bike,
which tends to make the cars think I'm not a good
cyclist (could actually be true) and they tend
to slow down or take a wider berth.
If I feel a car or truck (more usual scenario) is coming up behind me too fast, I stick my hand out and wave it up and down like a bird, signalling them to slow down. This works remarkably well and they probably think I'm nuts! When in the city making both left and right hand turns as well as navigating round-abouts I always use hand signals to let the traffic know my intentions.
Ride defensively, but always act like you are in control of the situation. In busy traffic, hand signals show the traffic what move you intend to make. Don't falter; stick to it. Don't ride next to one another unless it is completely safe and the road is free of vehicles. Road rules are there for a reason, namely so everybody is aware of what the next person should be doing. Obey them: cyclists who don't give other cyclists a bad name.
For me cycle touring is definitely about being aware of my immediate surroundings. So, looking behind me is something I do often, not only from a safety point of view, but one from the world of photography too. Even so, up until recently, I always did this the hard way: without a mirror. Now that I have invested in a bike mirror, I won't ever feel comfortable riding without this ease of rear vision again.
The Zefal Spin was my choice. Tiny and lightweight, but sturdy and which attaches to the end of my bar end, but there more great mirrors out there to choose from. Not only does the Zefal Range get the thumbs up, but bike mirrors from Mirrycle Corporation do too.
Read
a review on BicycleTouringPro.com about
four different CycleAway mirrors
on the market.
Looking
for a rearview mirror that attaches to your
helmet: the Bike
Peddler Take a Look Mirror comes so highly
recommended, it must be good.
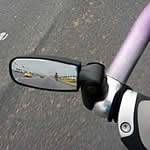
the Zefal spin mirror
with its great viewing
angles and neat
fold-away feature
Wearing light coloured clothing or vests and garments with reflective panels is a personal choice. Although we began our journey with relatively few of these articles in our cycling wardrobe, with the continuous exposure to busy traffic conditions, we have added more and more of this type of clothing to our panniers.
"Be seen" is definitely a cycle touring tip and this doesn't just mean you. Your bikes and luggage can also be dressed up with reflective gear.
Anyone who has travelled in Asia will have seen this numerous times before: old cd's used as bicycle reflectors. I used one on the back of my Ortlieb dumpsack which I think was ample, but I have seen wheel spokes completely filled with these discs. Another popular spot is to attach one is directly behind a red reflector or your back bike light. This really boosts your visibility. To attach to my bike bags, I made a custom velcrose strap that can be used elsewhere if need be.
A few lighting
tips for your bicycle
Bicycle lights have come a long way since the simple LED Cateye entered the market
and it is now difficult to know which ones to choose. One thing for sure is,
as a cycling traveller, there will be a number of times when you will need to
use them. For most tourers, cycling at night is generally not in the plan, but
plans don't always work out and then there will be the odd rendevouz with a tunnel
or two.
As front lights, we wear a normal camping headlight on our head. Take a look at the Petzl range They are affordable, efficient and you can choose what light strength (lumens) you want. But the tip here is, items which serve for more than one function in our on-the-road lifestyle are always a bonus. Another light which fits this bill is the Princeton Tec EOS bike lamp. It gets great reviews.
Rear lighting is also a new ballgame and there are probably a couple on the current market worth mentioning:
Flashbak rear light from a company with the motto "be seen", is becoming extremely popular with cyclists. It is a flexible clip on bike illumination product, more akin to a roadworkers' warning device than a bike light. Stands to reason that it is visible for up to 1 mile. Flashbak claim battery life is also a very effective 100 hours. Check out the bicycle design review for further details and pictures.
And the much talked about tail light: the Planet Bike Superflash. The company also makes some pretty reputable LED front lights too.
With Reelight bike
lamps the environment can breathe a little
easier. This revolutionary Danish design
and technology is based electrodynamic induction.
In simple terms: they use magnets not batteries.
Definitely those who want to save money in
the long run and do something towards a greener
planet. Available from stores all over Europe,
in Japan, South Korea and some parts of the
USA and Brazil. Reelight
SL120 or the Reelight
SL100 Flashing Light Sets are
also available online.
For
those of you
that are into
a bit of DIY
lighting take
a look at the Bicyclelighting.com website.
It not only gives details on how to construct
a high performance
bicycle lighting
system, but also contains information on bells,
horns, dynamo
powered lights,
and other bike safety devices.
Xenon strobes are a lighting technology that generate more visibility than LED flashers. While these are more common in industrial application, they have not really hit the biking world in a massive way, but they are an option to look at. Unfortunately, even though they are incredibly bright, they are expensive and not so efficient with battery time. There is also some concern over their reliability. Still it doesn't hurt to see what's on the market at Lightmanstrobes and where you can purchase them in the US.
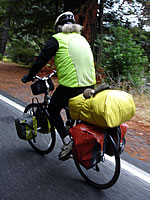
a bright vest and luggage
definitely increases your
visibility when cycle
touring
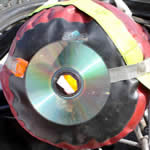
a nifty way to recycle
cd's and get a free
luggage
reflector as well
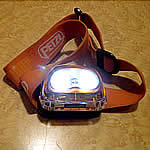
not
only for seeing
at
the evening campground,
but for cycling
in the dark too
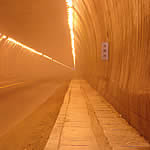
tunnel vision in one of the
well lit passages in Korea
Biking in Tunnels
Cycling through any tunnel is always a scary event in my journal. Mostly because of the uncertainty
of your position in relation to traffic, the strange
lighting and the ear deafening noise vehicles make
as they enter, pass through and then exit. It goes
without saying that being well lit and having ample
reflective gear is a must for a safe passage.
A good tip from the Western Australia Department of Transport is to watch your shadow when being approached from behind by a car. If your shadow does not start to move to the left as the car approaches, then you should get as far left as you can. Note: cars drive on the left hand side of the road in Australia! Whether I will actually think about this, the next time I venture inside a tunnel, remains to be seen.
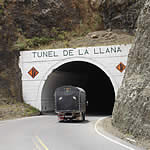
one of the not so well lit
tunnels in South America
- Wear as much reflective gear, including hanging it from your luggage.
- Use lights both back and front
- Check out Cycletourer.co.uk for their tunnel map of Norway
- A map with a scale of 1:300,000 is a good purchase. Normally the significant tunnels will be indicated, so at least you know what you're up against.
- Research blogs and internet resources about the country you are travelling in before hand. Some countries that have an abundance of vehicle-bike shared tunnels: Japan, South Korea, Italy: where by law you must wear a reflective vest or belt in tunnels and from dusk to dawn, Norway, France, Switzerland, selected areas of the USA and Canada, and Chile: though in that last country, you will get a compulsory pick-up ride through all of the major tunnels.
Survival sheet protects you in the cold
Simon
and Pierre-Yves - two French guys we joined
up with in Greece - told us about this great tip:
If it gets too cold for you to handle it in your tent, then lay a survival sheet
on the floor underneath your matresses. For temperatures well below zero, you
can place one over the top of the inner tent as well. They are light to carry
and every cyclist should have at least one in their first aid kit anyway. Obviously,
they are not indestructable, but replacing them at intervals during your cycle
tour is not really going to break the budget.
And for those of you who suffer from cold feet at night: wrap your Goretex jacket around them before you zip the sleeping bag up. It is guaranteed to keep your toes toasty warm throughout your sleep.
The best wet-weather gloves
money can buy
Gloves that are so bulky its difficult to change gears; gloves that freeze your
fingertips; and gloves that just simply aren't waterproof when they said they
would be. We've tried them all until this tip passed down from Max to Kevin presented
itself to us: So, here's the simple and affordable solution...
Any set of gloves; even your long fingered bike gloves will do for the inside layer and then cover them with a pair of industrial strength latex gloves. Stops the inside gloves from getting wet, so your hands stay warm and dry and you can still use the thumb shifters too.
When lightning strikes
While I absolutely love watching thunder and lightning storms, I hate cycling
in them and basically, it is not a good idea to do so either. The rumour about
your rubber tires and rubber soled shoes protecting you is not true. If you
can hear the thunder then there is a chance you could get struck and shelter
should be your first priority.
Common sense prevails here. The bigger and the sturdier the shelter the better. Water or areas prone to flooding are not a good idea and if trees are your only option, then choose a small robust one. You can tell how far away the storm is by counting the seconds between when you see the lightning and when you hear the thunder - I always count in my head "1 mississippi; 2 mississippi; etc". Divide the seconds by 3 and you've got the approximate kilometres; divide by 5 and you've got miles.
If you are really interested, then here are a couple
of internet resources pertinitent to cycling about
what to do in a thunderstorm to reduce your chances
of being struck by lightning:
The
Western Australian Department of Transport's
fact sheet: Lightning
is a Danger for Riders [pdf]
The
League of American Cyclists' Advanved Cycling
Resources: Surviving
a Thunderstorm
TravellingTwo's
article: Bang!
Avoiding lightning on your bike tour
When the sun shines
Similarly dangerous is the sun, even
in places where the temperatures are not high.
Coming from Australia, where it was drummed
into me from from a young age to "slip
slop slap" [that's Aussie for slip
on a shirt, slop on sunscreen and slap on a
hat], I am amazed at just how many people forget
to use protection on a regular basis.
Cycle touring often means you will be out
there in the sun while it is at its most powerful,
so if you can't reduce the amount of time you
are exposed to its rays, then at least remember
to do the following:
Smear your exposed skin with sunscreen of high SPF factor (30-50). In really high temperatures and high altitudes, you may even need to use sunscreen underneath your clothing, depending on whether it is SPF certified or not. (Yes they do make special SPF clothing these days: just google sun protective clothing)
- Apply lip balm with sun protective qualities.
- Wear sunglasses with total UV protection: your eyes also need protection from UV light.
- Wear a helmet or some sort of hat: remember to watch out for you neck as well, so something with a wide brim or a specific neck covering is best.
- Cover up with lightweight long sleeve shirts and pants if you feel the sun is getting too intense.
- Be aware that snow, water, sand, glass and cement reflect the sun and can increase the exposure to ultraviolet lights significantly.
- Drink lots of water in small amounts at regular intervals throughout the day.
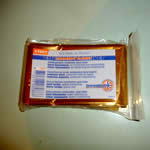
an emergency thermal
blanket can keep you
warm on a freezing night
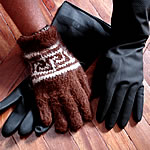
wet weather gloves
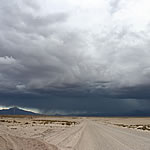
it is best to take cover if a
thunder storm approaches
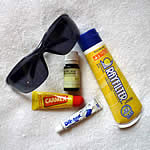
the biking essentials
for
sunny climates
and high altitude
Just relying on thirst alone while exercising is not enough to prevent dehydration. As a cycling traveller this is something you need to bear in mind. Dehydration not only occurs when you don't replenish the water lost from perspiration and urination, but also if you are sick. Coupled with vomiting and diahorrea, problems that also arise when travelling in countries with poor hygeine and water supplies, the situation can get quite serious. And considering that drinking a moderate amount of water beyond the needs of your body will not harm you, it is better to consume as much as you can.
A good indication of your hydration level is to keep a check on your urine output. If there is not much flow and it is dark yellow, you need to drink. The first sign of dehydration is usually thirst and a dry mouth. Other symptoms can include loss of appetite, fatigue or weakness, headache, dry skin, flushing, chills and dizziness.
Replacing the water loss is the first stage of treating dehydration. Drink slowly and in small sips. Electrolytes found in sports drinks like sodium and potassium salts probably need replacing too. It therefore pays to have a sachet of rehydration salts or tablets in your first aid kit, but if you get stuck in an emergency situation your can create your own simple solution.
ORAL REHYDRATION SOLUTION (ORS)6-8 tsp sugar
1 tsp table salt
1 litre water
6-8 tsp (30 g) sugar
½ tsp table salt
½ tsp baking soda
¼ tsp salt substitute like
Lite Salt,
which is
potassium based
1 litre water
1 tsp = 5 g
1 tsp = 5 ml
3 tsp = 1 tablespoon
You can make this mixture
up before
you go and store
in little zip lock bags.
Keep them dry.
Add a pinch of ginger
powder
or some
freshly
crushed
ginger for nausea
inhibiting
qualities.
oral rehydration solution
crystals and tablets
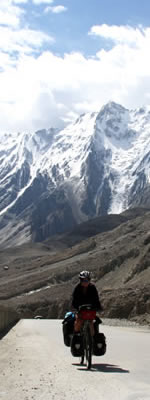
climbing high on the
KKH in China
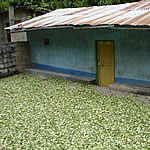
coca leaves are
readily available
in Bolivia and Peru
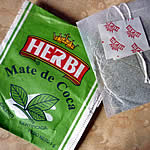
coca teabags are
found
in most stores in
Bolivia and Peru
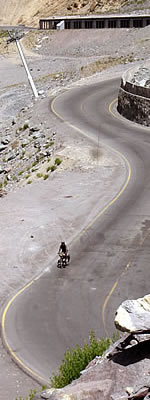
on the way up to the
Christo Redentor
pass
in Chile
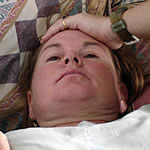
By the time we reached an altitude of 4000 metres above sea level on our way to Cerro de Pasco in Peru, I had the makings of a monster headache: the type that makes you feel like throwing up; the type where someone has put a vice on your skull and is turning it very, very slowly; the type that renders you powerless. Horrible stuff.
The higher in altitude you go, the less oxygen there is in the atmosphere. With slow and short ascents, your body has a better chance of adapting to the decreased oxygen, but the more rapid the climb and the greater the height covered, the higher the risk of acute mountain sickness (AMS).
It usually begins with a headache, though that could also be a symptom of dehydration (your body's acclimatization process alone uses lots of water). Essentially though, blood thickens at high elevations as fluids flow into the body's tissues. This decreases the efficiency of distribution of essential elements and the elimination of unwanted components. The outcome is a headache, weariness and extreme thirst. Drinking lots of fluids prior to and while climbing is essential. Around 4-6 litres per day is recommended and make sure your urine is pale yellow in colour, copious and regular.
The weird thing about altitude sickness is that it can hit anyone: at any time, at any age and at any level of physical fitness. Following all the guidelines, doesn't mean you won't be affected. Likewise, just because you've been affected before, doesn't mean you can expect the same outcome the next time: even when travelling up the identical mountain.
The following tips will only decrease your chances of suffering from high altitude sickness when travelling above 2500 metres, but prevention is definitely better than cure:
- Climb high and sleep low: the climbers golden rule * see notes below
- Drink plenty of fluids to stay well hydrated
- Keep overexertion to a minumum (though on a loaded bike in mountain terrain, this can be difficult) Take your time!
- Eat light, but high carbohydrate meals
- Avoid alcohol, caffiene and tobacco
- Don't go any higher, if you begin to show symptoms of altitude sickness. Wait until they decrease
- Go down, if altitude sickness symptoms increase
* Most resourses say not to increase your elevation by more than 300 metres per day. This means you can go higher, but you'll need to return to a lower altitude to sleep. In my experience, loaded cycling can sometimes mean climbing more than this recommendation in one day. If this is the case, be aware of what your body is telling you. Don't be too proud to turn around and go back down or hitch a lift. Though not common these days, altitude sickness can still be life threatening.
Remember that the only cure for altitude sickness is acclimatisation or descent. The drug Acetazolamide does not stop acute mountain sickness, it merely pushes part of the acclimatisation process along, thus helping to relieve symptoms. For more nitty gritty information it is better to browse through the following travel health websites: md travelhealth.com & traveldoctor.co.uk.
All dried up
At high altitudes, the atmosphere is also drier than
at sea level, so you might consider protecting
yourself against this element too. Lotions
and potions to carry along could include:
- Lip balm
- Sunscreen
- Moisturiser
- Saline nasal spray or moisturiser.
Also avaialbale are natural and drug-free moisturisers like Better Nose - Dry eyes remedy, especially if you suffer from this already
Reaching the sun
Don't forget at high altitudes that the sun can
be incredibly powerful. Even if it doesn't feel
hot or if it is cloudy, you are closer to the
sun and therefore the ultraviolet rays are more
intense and the sunburn risk is higher. So, don't
forget to:
- Use a high SPF sunscreen and lip balm
- Put on a helmet or some sort of head protection
- Wear sunglasses (especially in areas with snow since it reflects the suns rays)
Native therapy
In Peru and Bolivia, the indigenous
population have been using coca leaves for
centuries as a stimulant and to combat the
effects of altitude sickness. Modern science
hasn't put its stamp of approval on this
remedy, but there are enough testemonies
out there that say it helped. And
besides, it is not going to kill you.
Now before you start thinking that I'm endorsing some sort of contraband drug, I should explain that coca leaves are perfectly legal in South America. While they contain an average of 0.8% cocaine, the effects from consumption of the fresh leaves do not produce the euphoric and psychoactive effects associated with use of the drug. Mind you on a few ocassions I probably wouldn't have minded if they had.
Either chewing a couple of leaves or drinking the coca mate [coca tea] is said to energize you and suppress hunger, thirst, pain, and fatigue. So, before we embarked on our mountain adventures in Peru, I purchased a little bag of coca leaves for 50 soles cents - about €0.17 - in Tingo Maria. In hindsight, I could have bought them from any one of the small villages along the way: drying coca leaves line the pathways leading up the Andes.
And in my experience, I can definitely vouch that it is a stimulant and if you had a really bad toothache, it is capable of numbing your gums quite effectively, but unfortunately it did nothing to stop my pending headache from turning into a fully blown migraine. Maybe I should have chewed on a few leaves before I left instead. Nonetheless, I enjoyed sipping on the coca tea, available in bag form in all food stores. Other natural products that are said to help with altitude adjustment are:
- Clove: contains the potent blood thinning compound eugenol.
- Garlic: with a high number of blood thinning compounds (carrots, fennel, parsely, tomatoes, soyabeans, parsely and onions also have considerable anti-aggregant activity too)
- Mints containing thymol, menthol or menthone: horsebalm, thyme and wild bergamot to name a few
- Reishi mushroom: the Asian answer to coca leaves
- Ginkgo: increases blood flow
ANIMAL ENCOUNTERS WHILE CYCLING & CAMPING
Eyes
in the back of your head
Being dived bombed by a feathered creature
with a very sharp beak is a pretty scary experience
in anyone's day. Magpies have a habit of attacking
not only pedestrians, but also cyclists too.
And it
can be very disturbing experience indeed. The
Western Australian Department of Transport
has therefore published a Fact Sheet about
how to cope with the situation. And you have to hand it to
the Ozzies for coming up with hilariously innovative
ways to combat these flying nuisances.
Have a read to find out for yourself: Dealing
with Swooping Birds
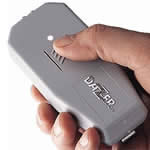
the Dog Dazer
Dazing canine cunning
For reasons unbeknown to me, dogs from all walks
of life seem to have an objection to pedalling
legs and will dash from far, far away to try
and rid the roadside of their pet-hate: the
cyclist. Hence, nearly every touring bike forum
has a thread dedicated solely to advice of
how to get out of this, sometimes very scary,
situation.
I have been bitten once and I'll do anything to save myself from the same experience again.
Now, there are many ways of handling those savage canines when they come hurtling towards you, bearing their dagger-like namesakes and looking as if they'll have you and your bike for dinner.And that's because there are many types of dog.
Here are a couple of tactics to try out at the next dog attack:
- Stop, get off and walk with your bike between you and the dog. (This is not always a nice situation with a pack of them)
- Squirt water at them. (Some people even have a small squirt bottle filled with lemon juice or watered down chilli sauce for the purpose)
- Bend down to pick up a stone and pretend to throw it. If this doesn't work: actually throw it.
- Be authoritative and yell a few commands: dogs can smell fear and will try and be superior.
- Bark back: loud and hard. (Sounds stupid but has worked a few times on domesticated dogs. Doesn't work with shepard-working dogs)
- Flag down a car to assist in shepherding you away from the dogs. (Used this method in Turkey and Greece lots of times. Locals actually did it without us asking a few times.)
While all these methods above have their merits, they are not always effective and after some exasperating times in Turkey, we finally took the plunge and bought a Dog Dazer: a technique that has worked more than 95% of the time for us. Please note: we used the Dog Dazer that had never heard the emitted sound before. We cannot vouch for long term use of the device. Anyway, here's how the deterrent works and what we discovered while cycle touring with annoying dogs.
- works from around the 7 metre mark, but it does depend on the dogs hearing ability
- emits an ultrasonic signal that our canine friends don't like
- doesn't hurt dogs
- batteries last for a very long time (couple fo years!)
- compact (a little on the large side), lightweight, plastic but durable.
- don't even have to get off your bike to daze them in many cases, especially if it is easily accessible in your handlebar bag
- doesn't work on dogs that are hard of hearing like older animals or those who have damaged eardrums. It also didn't work on a bitch with a litter of few day old pups either - says something about motherly protection, but even it its effectiveness was 90%, I'd still have it in our kit.
- it saved us one evening from an attacking dog while camping wild in Iran. We didn't even have to get out of the tent.
- the least stressful, for human and beast. of all the dog deterrent methods we've used
- one of our wisest purchases (though not continuously used, when we have to rid ourselves of annoying dogs we are glad we have it).
Want one? Purchase on Amazon.
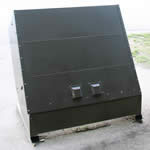
bear proof cache right on the road ready for you to use
Camping in Canada in a spot with no food cache? Then here's a tip, besides the tediously annoying "hanging your food bags between two trees" solution.
If a typical rubbish bin is in close vicinity, then open up the back (you'll need two hands for this operation since they are bear and racoon proof) and underneath where the rubbish bags hang is enough space to store your food overnight without it getting contaminated by the rubbish that comes in from the front. Want some resources about how to camp in bear country when travelling in Canada and the States?
MEDICAL TRAVEL ADVICE
World travel vaccination plan against diseaseAfter a consult with the local GGD (health care centre) in Arnhem, the Netherlands, we decided we needed the following vaccinations to keep us going for the first few years. By getting these vaccinations beforehand, you can leave home well prepared and that's one less worry you will have on the road ! Since the initial injection plan below, we have had new vaccinations to keep ourselves boosted. See the Time Schedule below.
DTP - Diphtheria, Tetanus, Polio
Hepatitus A, Hepatitus B
Typhoid
Yellow fever
Rabies
Meningitis
Mantoux-test (tuberculosis)
*1 Rabies booster in New Delhi,
India
*2 renewed Typhoid & Meningitis
Quito, Ecuador
how to vaccinate
1 injection
3 injections: [1 & 6 month pause + blood
test]
1 injection
1 injection
3 injections [ 0, 7 and 21 days]
1 injection
longevity
10 years
life
3 years (*2)
10 years
2 years (*1)
3 years (*2)
5 years
3 years
cost p.p.
€ 24,00
€ 201,00
€ 30,50
€ 28,50
€ 87,00
€ 32,50
€ 23,50
€ 6,30
€ 24,70
- 31-08-2009 Inocculated again with both Typhoid and Meningitis injections after three years. Vacunas farmaceutical clinic in Quito. No appointment necessary, just rock up with money. Total cost: US$69,12 for the two of us. Check out their website for more info on addresses: www.vacunasyvancunas.com
- 05-10-2007 Booster Rabies shot in Delhi, so we are now "protected" for 5 years. If bitten by rabies infected animal, we only need one or two extra shots with the vaccin (Rabipur).
- 30-05-2006 Third rabies shot and last time in Wageningen... now only Mantoux test in Arnhem to go.
- 16-05-2006 Second rabies shot; third in two weeks from now.
- 09-05-2006 First Rabies-shot at Wageningen University. They put the vaccin under the skin and it is therfore a lot cheaper than at the GGD in Arnhem (€29 instead of €70). Two more visits in three weeks and a booster after one year.
- 02-05-2006 Typhoid and meningitis shots at the GGD in Arnhem. Valid for three years, so we have to get shots while we're on the road... next stop Wageningen for 3 visits for rabies at the Vaccinatiecentrum.
- 22-08-2005 The results for the blood test are in and the vaccination has worked! The response was normal, i.e. 1000 mlE/ml. So, according to the guidelines, we're protected for life against Hepatitis B and won't be needing any re-vaccination.
- 19-07-2005 Hepatitis B blood test: results in 6 to 8 weeks.
- 07-06-2005 Third -and last- batch of Twinrix. Back in six weeks time to see if there is any result; i.e. checking our blood for immunity to Hepatitis A & B.
- 01-02-2005 Second batch of Twinrix (next stop June)
- 14-12-2004 First jabs as preparation for our world tour: DTP, Yellow Fever and the first batch of Twinrix (Hepatitus A&B). Starting early with these vaccines since they last a long time and if we spread them over the next 3 calender years, we'll get some money back from our health insurance. Vaccinations are expensive!
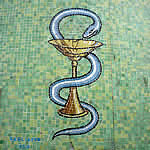
mosaic medical symbol
on pharmacy wall
in Tunisia
FREE Yellow Fever Vaccination
Where to obtain the vacunas contra fiebre Amarilla / yellow fever vaccination in Argentina.
Yellow fever is contracted from the bite of an infected mosquito and not only as the name suggests, besides fever it also causes muscle pain, headaches, shivering, nausea and vomiting. Most people start to recover after three or four days, but these are certainly sysmptoms that you would rather avoid if at all possible. Those who don't improve, enter the second phrase of fever, causing jaundice and blood in the vomit and they have about a 50% chance of surviving. Medical Authorities recommend vaccinations since there is no treatment. After an outbreak of yellow fever in a group of monkeys in January 2008, the good news is, the Argentinean health system now offers free vacunas contra fiebre Amarilla [vaccination against yellow fever] to everyone: even foreigners.
In Buenos Aires the yellow fever vaccine is given free of charge at the clinic at 690 Ingeniero Huergo Avenue (near corner of Huergo and Chile). The working hours change regulary, so it pays first to check first by dropping by. You will require your passport and please note that it is NOT the only clinic to give an official certificate in Argentina as some internet sources report.
In San Carlos de Bariloche, Río Negro, Argentina you can get innoculated at the local Hospital on Fridays at 1pm. It is an not-to-be missed, multi-story building taking up an entire block on the corner of Elflein and Otto Goedecke in the city centre. In 2009, you needed to register with your passport prior to 11am on Fridays at the registration office one floor below where the vaccinations take place on the main floor. They inoculate you on the same day and they also issue official certificates.
In Mendoza, it is also possible to get your yellow feverjab for free at Hospital Español, on San Martin 965 near the corner of Erlich in the city centre. Opening hours are spasmodic, so telephone + 54 223 449 0300 or pay a visit first.
MalariaSo far we haven't been in areas where we thought the risk was big enough to take tablets. We keep informed about areas prone to this disease by talking with other travellers and researching on internet. If you are planning to travel overseas, spend some time browsing through the following sites. They have a wealth of world health info from country-specific vaccination requirements; medical advice; to listing worldwide travel clinics and discussing other travel tips.
mdtravelhealth.com
traveldoctor.co.uk
We haven't claimed anything on our insurance policy. There has been no need to, although Sonya has seen the inside of a hospital on several occasions. The price tag, if any, was always too low to bother filling in forms or paying the deductable claim fee.
So, you are probably wondering what the service or competency of overseas doctors and nursing staff was like. Well, to be honest, we have always found hospitals and their staff, even the underfunded local hospital in Agra, to be helpful, knowledgeable and as professional as their surroundings and equipment allowed. If any of our injuries required major surgery, I'm sure we might possibly think about going somewhere in the world where they speak our language and have more modern techniques. But for the minor health problems we have faced so far, a visit to local hospital has been more than adequate. And we have had our fair share of those:
Sonya's trips to the doctor
We
visited the local hospital in Pompei, Italy,
after Sonya was bitten by a dog.
The consultation and treatment (cleaning the
wound and subscription ointment) were free and
according to the local practitioners there is no
rabies in the Pompei area and so far
she hasn't started frothing at the mouth.
Sonya had her ankle x-rayed and plastered for a fracture in Istanbul, Turkey. This later needed to be removed andthe total bill came to € 30, inclusive of the doctors advice. We do need to add here that thanks to Seyfi, the price of the plaster was bartered down considerably. The set of crutches of €20 were later donated to someone in need of them.
In Osh, Kyrgyzstan, Sonya saw a doctor, an x-ray woman (who wanted a bribe, but didn't get one) and got wrapped up in more plaster - this time her wrist - at the staggering cost of almost € 3 .
In Agra, India, the all-day-and-well-into-the-night hospitalisation of Sonya, when she fell victim to a severe sciatic nerve problem, was free. This was Including the six x-rays and the consultation of all the specialists that attended her - also six. The MRI scan - in a private clinic - set us back € 80. But the ambulance ride to and from there was free. It should also be brought to attention that Sonya got booked in for the MRI in just 6 hours: no waiting lists and for less than € 100. Beats any western world system we've heard of.
Aaldrik's turn for treatment
Ali
visited the local hospital in La Pintada, Colombia,
after falling off his bike.
Roughly € 7 or 19,900 Pesos, was all the doctor's
consultation cost . They didn't have
an x-ray machine at the time - only available
on Saturdays, so we never did find out if
anything was broken in
his arm or
not, but so far...
In early 2011 Ali fractured his left ankle in St. Catherine, Egypt. A visit to the hospital, an x-ray, a cast and another visit to remove the plaster set him back 200LE (roughly € 25), with the help of Saleh, the owner of the camp we stayed at.
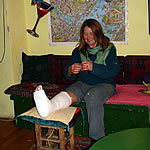
Sonya cast number one
Sonya cast number two
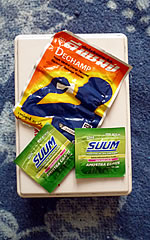
feeling sick on the road
is no fun at all
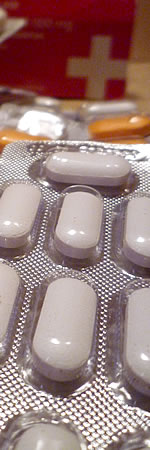
Over the counter medication can be found the world over, but for budget travellers like us, some of the poorer countries in world have the best deals. Firstly, it is highly unlikely you have to see a physician first to get what you want, which saves oodles of cash and you'll have access to a wide array of drugs. Of course, you have to be careful that you are not purchasing some ineffective copy and you also have to be confident that what you have self-diagnosed is really the illness. Misuse of medicine could cause even more problems.
From our experience though, it has been relatively simple: stomach problems more frequently known as Delhi belly or travellers diarrhoea and the occasional bout of worms have been the extent of it. So, we have always been able to obtain what we needed quite easily and it wasn't really difficult to identify what the problem was.
It pays to stock the first aid kit up in places like the Middle East, Central Asia, China, India, Nepal and south east Asia as well as Mexico, Ecuador and Peru. Here the prices of over the counter drug is incredibly low and you have your pick of pretty well everything. We have used the following quite regularly in poor hygiene and water quality areas of the world:
- Tinidazole: anti-parasitic drug used against protozoan infections and giardiasis (also known as bever fever)
- Ciprofloxacine: an antibiotic extremely effective against infectious or contagious diarrhoea caused by bacterium, viruses or parasites infecting the digestive system (something both of us have had from Iran to present day)
- Mebendazole: depending on the dosage, for all types of intestinal worms
- Dramamine:
prevention and treatment of nausea, vomiting
and dizziness.
Motion sickness thus.
For more information on Seasickness see our Tips & tricks: Travel page.
If you need to research or
find out anything about medicine while you
are travelling take a look at the following:
Drugs.com:
a great all round drug and medication information
website
Druglib.com:
good for checking correct indication and dosage
information
Drugwatch.com:
check out what the experts have to say about
drug side effects
Wikipedia is
also helpful, but always cross reference any
information about medicine and its usage. That
also applies for the other websites listed
here as well.
stock
up your first aid
kit
in countries where
over-the-counter-drugs
are affordable
Our worldly
first aid and medicine kit
Okay, this one is entirely up to you...BUT
the three most pertinent questions you should
ask yourself are:
Where am I touring to?
What sort of terrain will I be
cycling?
How trustworthy am I of the
medical services in these
regions of the world?
From here you can build your
medical kit, it just depends on your adventure.
To give you an indication, our First Aid Box
is exceptionally extensive, because we never
really know where we might end up.
You could start
from here and cross off what you think is unneccessary.
Waterproof medical tape
Elastic woven bandage
Gauze patches (selection + some self adhesive)
Butterfly strips or stiches
Antiseptic: powder and liquid
Alcohol wipes
Alkaline salts
Oral rehydration crystals
3 various sized intravenous needles & syringes
needle for stitching wounds
scalpel knife with sterilised blades
Thermometre
Emergency blanket
Plastic gloves
Face shield
Methyl salicylate cream (muscle rub)
TopicalaAntibiotic (cream)
Analgesic tablets (panadol)
Anti-parasitic drug
Bacterial antibiotic
Broad spectrum antibiotic
Anti histimine tablets
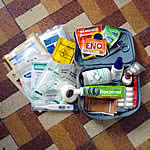
our well stocked
first aid
kit has
come
in handy a few times
REI has an extensive range of preassembled first-aid kits on offer.
Netdoctor.co.uk has a basic overview of "what's & why's" for the first aid kit.
Mdtraveldoctor for a few tips and links when choosing a first aid kit.
